Be careful of winter blooms: rot can start from here. Here are the species at risk

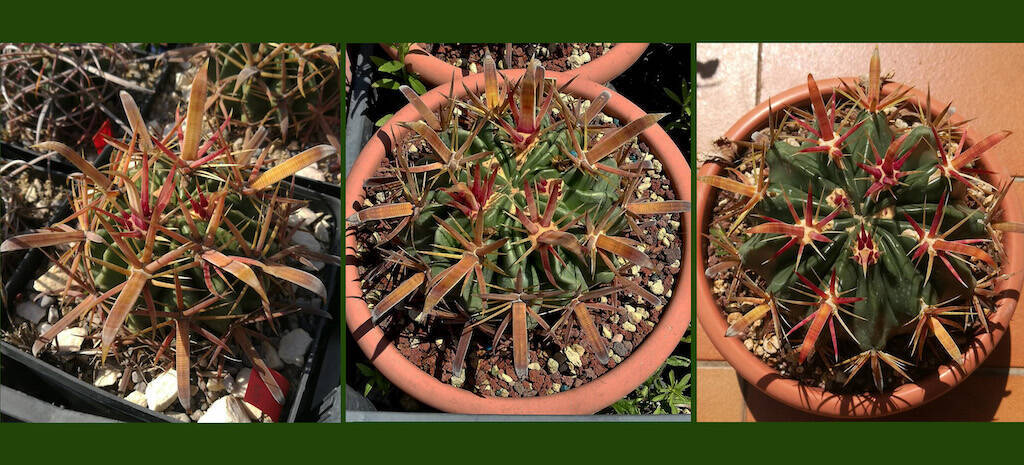
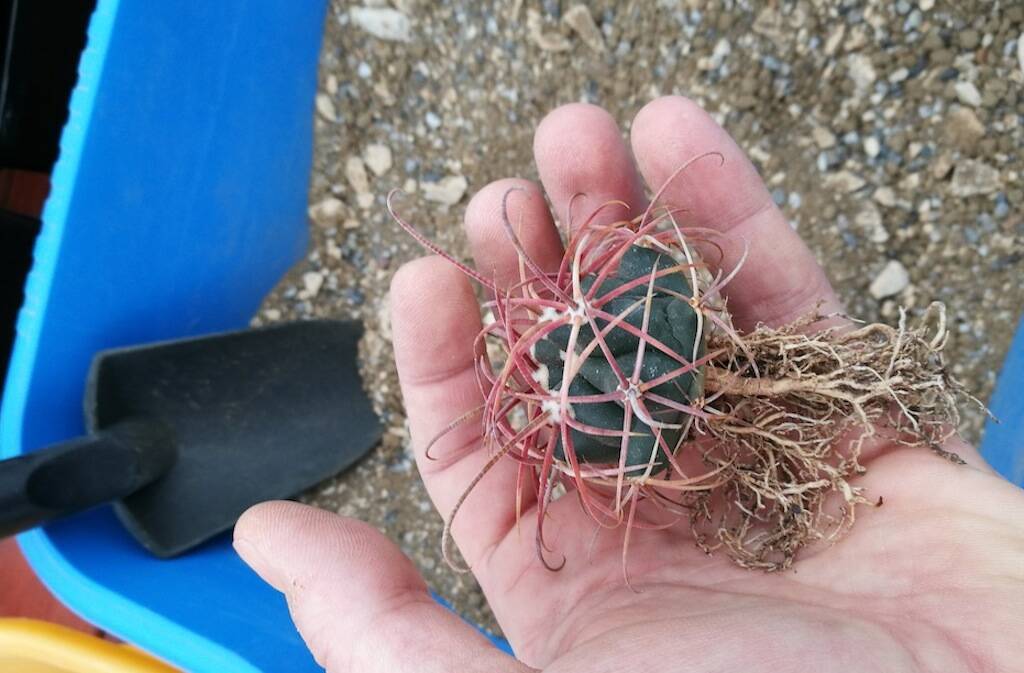
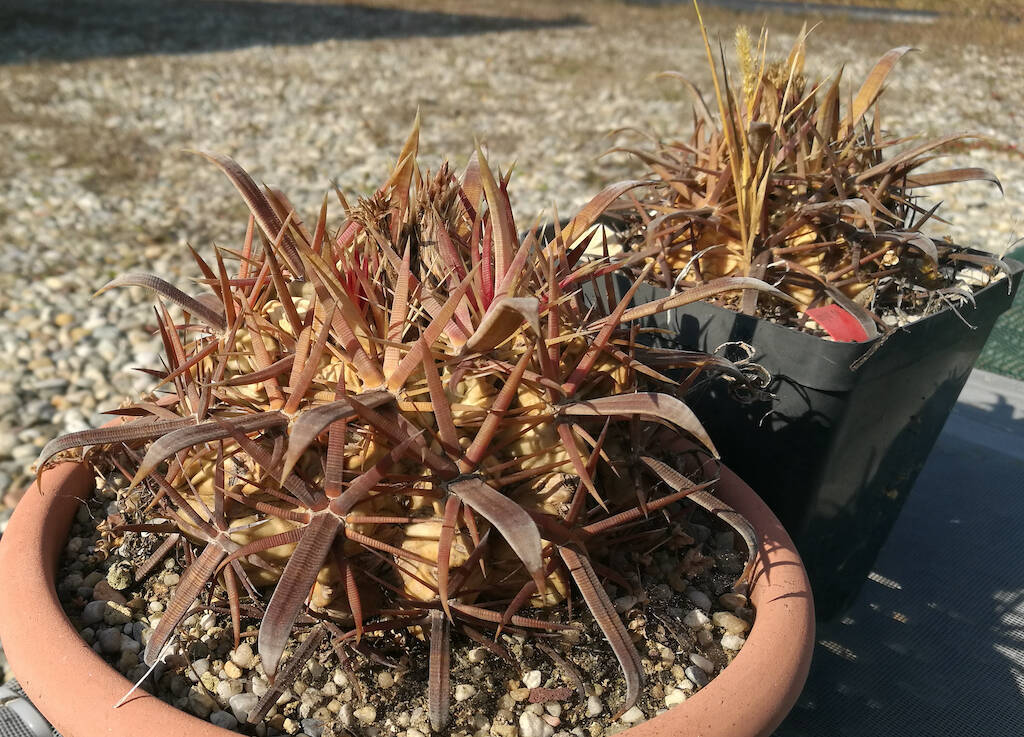
Unfortunately it is a less rare phenomenon than one might think. The flower itself, the maximum expression of the plant, its instrument for reproducing and safeguarding the species, can transform itself into its executioner. With cacti, plants that require seasonal rest corresponding to the winter months, the flower can sometimes be fatal. It obviously only happens with those species that flower in mid-winter, therefore a small minority compared to all cacti. But it is often precisely from there, from that flower that blooms in November, December or January, that the rot is triggered and which, if neglected or not seen, can lead the specimen to death. This is what happened to two of my Ferocactus latispinus in recent days. Or rather, in the past few weeks, except that the damage has become apparent recently. And now it was too late to intervene and save the plants.

In this article we look into this phenomenon and see what can be done to prevent it or, at least, be able to intervene before the rot passes from the flower to the plant. (…)

Per proseguire nella lettura dell'articolo Accedi o Abbonati
To continue reading the article LogIn or Subscribe

How a cactus changes depending on the type of cultivation: the difference made by soil and exposure

When they say that a picture is better than words. In this case, there are three photos, but the concept doesn’t change, and the difference between a cactus grown in a “natural” (or “wild”) way and one with a “garden-style”, based on basic notions and beliefs is quite evident. The plants I’m writing about are Ferocactus latispinus obtained from a 2012 sowing of mine. From that same planting, I’ve got at least forty plants. Over the years, I have given away some of them, but most are still with me and are growing beautifully. It’s important to point out that these are plants born from seeds contained in a single fruit (gift of a dear friend), sown the same day and grown over the years in the same conditions, i.e. in my greenhouse, in standard soil (pumice, lapilli and peat in equal parts), watered and fertilized with the same frequency. This is to say that the starting conditions, including the genetics and the grower’s hand, are the same. And yet, as you can see from the photo above, where the three plants (three at random of the twenty-five or so that I have kept for myself) are side by side, they show remarkable differences, at least to the discerning eye and the grower with a minimum of experience.

So let’s see, in this article, how and why different cultivation regimens, assumed as a whole and not just limited to the soil, affect so much the final result and really make the difference between a cactus grown and cultivated in any garden or generic nursery and a cactus grown by an enthusiast or an expert. (…)

Per proseguire nella lettura dell'articolo Accedi o Abbonati
To continue reading the article LogIn or Subscribe

Strengthening the thorns of cacti: a small experiment with some Ferocactus sowings

Based on the experiences of some growers, plants of the genus Ferocactus seem to appreciate the addition of calcareous material in the substrate. Above all, the thorns would benefit from it, which would be significantly strengthened compared to those of specimens grown in more “traditional” soils, for example the classic pumice, lapillus, peat mix in equal parts. Based on this consideration, I wanted to make an experiment with some of my sowings of Ferocactus acanthodes (seeds obtained from a dried fruit taken from an adult plant during a trip to Arizona) and Ferocactus latispinus. The acanthodes were born in 2013, while the latispinus are from 2010. Except for the seedling soil, which was based on peat, pumice and gravel, these plants grew up in the traditional compost with 30% fine peat and the rest pumice and lapillus in equal parts. I generally use this mix when I want to help seedlings develop more quickly, and then pass them into what I consider my “standard potting soil” made of sandy clay, pumice, gravel and 10% peat.

In the following article we see exactly what my experiment consists of, what type of soil I decided to use and above all we see the results with the photos taken two years after the test. (…)

Per proseguire nella lettura dell'articolo Accedi o Abbonati
To continue reading the article LogIn or Subscribe

USEFUL INFO AND CONTACTS​
SECURE PAYMENTS